“How to Convert Chest Freezer to Kegerator” is a fascinating project that can transform your mundane appliance into a dispensing system for draft beer at home. This process, while technical, can be accomplished with some basic tools and a bit of ingenuity.
The conversion of a chest freezer into a kegerator offers several benefits. Not only does it provide an efficient, cost-effective solution for beer enthusiasts, but it also gives a sense of satisfaction from completing a DIY project.
Before delving into the steps, it’s important to understand that the conversion requires a balance of practical skills and safety measures. This guide aims to walk you through the process in an easy, comprehensible manner, ensuring you can enjoy your homemade kegerator without any hitches.
Remember, this is more than just a project – it’s a journey into understanding the mechanics of your appliances and the joy of crafting something uniquely yours. Let’s embark on this exciting journey together.
How to Convert Chest Freezer to Kegerator
The first step to converting your chest freezer into a kegerator is gathering the necessary materials. You will need a freezer (obviously), a conversion kit, a CO2 tank, and a few other tools. Make sure to read through the entire instruction guide before you begin, to ensure you’re well-prepared for this exciting DIY project.
Gathering the Necessary Tools and Materials
The first step in converting your chest freezer to a kegerator involves assembling the necessary tools and materials. This would generally include a temperature controller, a drill, a hole saw, a tower cooler and, of course, the beer kegs. You can find these items at a local home improvement store or purchase them online.
Installing the Temperature Controller
Next, we’ll focus on installing the temperature controller. This is an important step because it prevents the freezer from reaching temperatures that are too low for storing beer. Connect the freezer to the controller, then plug the controller into an outlet. Set the desired temperature on the controller, usually around 38 to 40 degrees Fahrenheit.
Drilling Holes for the Tap
Now we’ll move on to drilling the holes for the tower tap on the lid of the chest freezer. Mark out the position for the tap, ensuring it’s far enough from the edges. Carefully drill through the lid using a hole saw. Remember, safety first. Always follow manufacturer instructions for any tools you use.
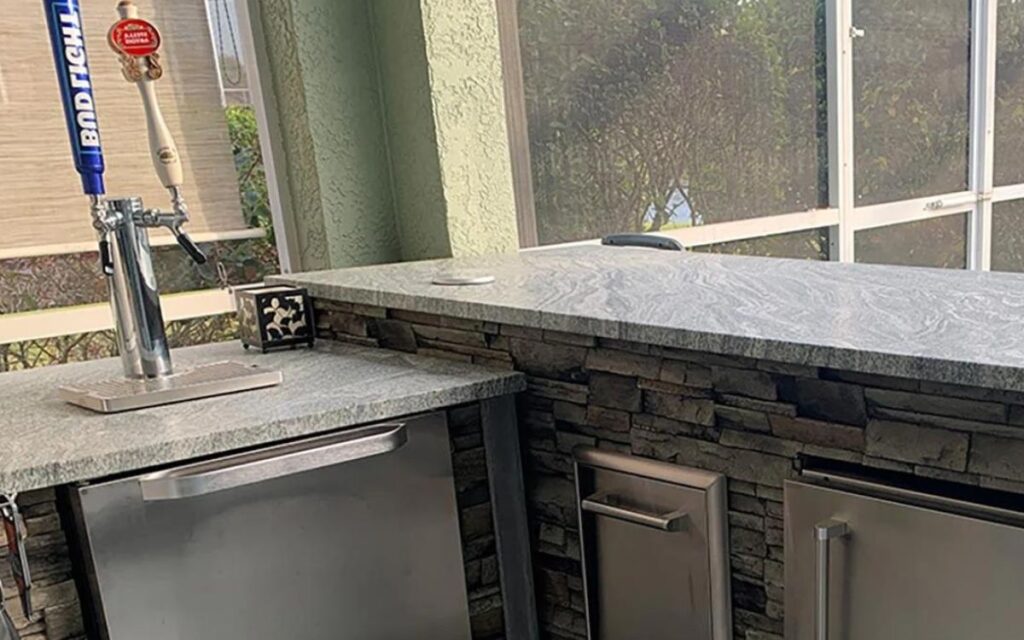
Installing the Tower Cooler
Once the holes are drilled, install the tower cooler. It’s essential because it maintains the beer at the same temperature all the way up to the tap. This prevents foaming and ensures your beer pours smoothly every time.
Final Steps
Finally, install the beer kegs inside the chest freezer. Once the kegs are in place, connect the lines from the kegs to the tower tap. Ensure all connections are secure. Congratulations! You have just converted your chest freezer into a kegerator. Enjoy the convenience of having draft beer at your fingertips.
Remember to clean your system regularly to maintain optimal performance and taste. Happy brewing!
What to Note When Convert Chest Freezer to Kegerator
Before you begin this project, there are a few things that it is important to keep in mind.
First and foremost, make sure the chest freezer you’re using has enough space for your kegs. The size of the kegs can range from 2-15 gallons, so be sure to measure correctly.
It’s also important to find a suitable location for your kegerator. Don’t forget that the unit produces heat – choose a spot where there is proper ventilation and away from direct sunlight. This will ensure maximum efficiency of your appliance.
Finally, make sure you consult an expert before you begin this project. Safety is always paramount when dealing with electricity and gas-powered appliances.
Happy converting! With some patience and the right materials, you can easily convert your chest freezer to a kegerator. Enjoy the convenience of having draft beer at home for years to come.
FAQs about Converting Chest Freezer to Kegerator
It’s common to have questions when embarking on a DIY project like transforming a chest freezer into a kegerator. To ensure you have a smooth experience, let’s address some of the most frequently asked questions on this topic.
- What type of freezer can I convert into a Kegerator?
Any chest freezer can be converted into a kegerator as long as it has enough internal space to accommodate the kegs. The space required depends on the size and number of kegs you plan to install. Check the measurements of both the kegs and the freezer before you begin.
Also, consider the freezer’s condition. It should be in good working order, maintaining a consistent temperature for optimum beer storage. Old or malfunctioning freezers might result in subpar performance or even spoil your beer.
- Can I install more than one tap on my Kegerator?
Yes, you can install multiple taps on your kegerator. The number of taps you can have largely depends on the size of your chest freezer and the number of kegs it can contain. Each keg will require its own dedicated tap.
Having more than one tap allows you to dispense different types of beer simultaneously, which can be handy if you enjoy variety or often host parties. However, keep in mind that installing multiple taps will require additional parts, increasing the cost and complexity of the project.
- Is it safe to convert a chest freezer into a Kegerator on my own?
Yes, it is generally safe to convert a chest freezer into a kegerator by yourself as long as you’re comfortable using the necessary tools and follow the instructions carefully. Most of the steps involved, like drilling holes and installing taps, are straightforward and do not involve dealing with the freezer’s refrigeration system.
However, remember that you are working with an electrical appliance. Always unplug the freezer before working on it and be cautious when handling tools. If you’re unsure about anything, it’s safer to consult with a professional or someone experienced in similar DIY projects.
Final Thought
Converting your chest freezer into a kegerator can be a fulfilling and rewarding DIY project. Not only does it allow you to enjoy draft beer at home, but it also offers an avenue to share a unique drinking experience with friends and family.
This guide has provided you with the necessary steps and precautions to consider during the conversion process. Remember, the success of this conversion lies in proper planning, having the correct tools, and following instructions carefully.
Performing the conversion safely and accurately ensures you enjoy the desired results, transforming an everyday appliance into a custom, convenient beverage dispensing system. So, whether you’re a craft beer enthusiast or simply enjoy hosting parties, converting a chest freezer to a kegerator might be the perfect project for you.