How To Make Ice Cream In A Blender is an easy, creative, and fun-filled culinary adventure. This quick method turns your favorite flavors into creamy, irresistible treats right within the comforts of your home.
This process is not only convenient but also offers you full control over the ingredients. Whether you prefer traditional vanilla or want to experiment with exotic flavors, the blender-ice cream technique fits all.
Enjoying homemade ice cream has never been easier. Follow this guide, and you’ll be blending up delicious batches of smooth ice cream in no time.
So, let’s embark on this delightful journey of making your own ice cream using a blender. Indulgence awaits!
How To Make Ice Cream In A Blender
In this tutorial, we’ll walk through a simple and efficient process to make ice cream in a blender. We’ll cover the necessary ingredients, the blending process, and some tips for flavor variations.
You don’t need any fancy equipment or culinary skills – just a blender, a few common ingredients, and an adventurous spirit. Get ready to create your delicious homemade ice cream.
Ingredients
To make approximately two servings of blender ice cream, you’ll need the following ingredients:
- 1 cup of heavy cream
- 1 cup of milk
- 3/4 cup of sugar
- 1 tablespoon of pure vanilla extract
Instructions
Step 1: Mix Ingredients
Start by placing all your ingredients in the blender. The order doesn’t matter, but I suggest adding the liquid ingredients first for a smoother blend.
Step 2: Blend
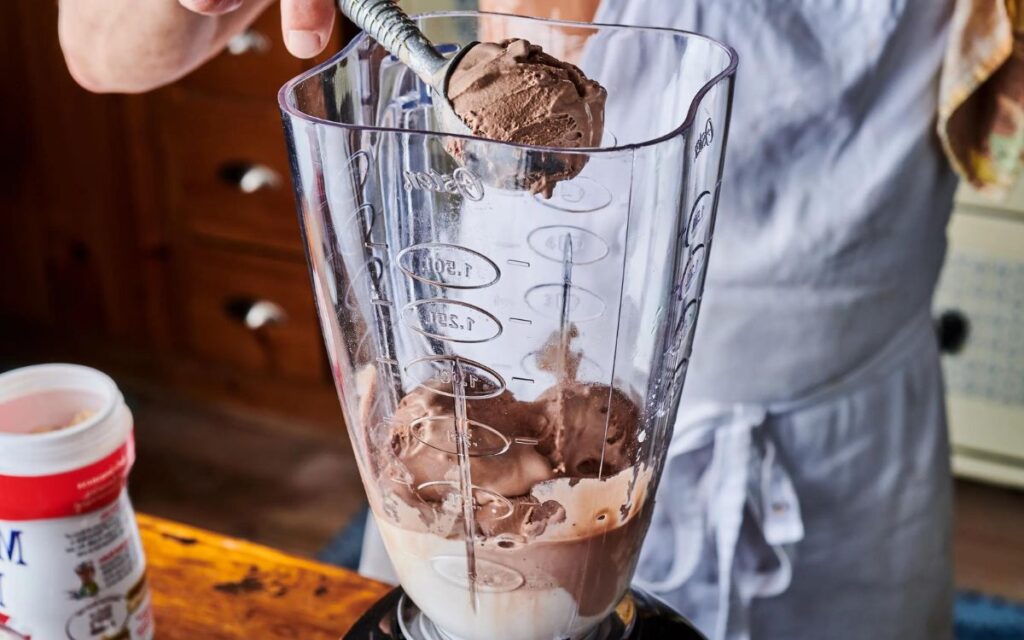
Next, close your blender and blend the mixture on high until it’s smooth. This usually takes around 2 minutes. Make sure the sugar is fully dissolved.
Step 3: Freeze
Once your mixture is smooth, pour it into a freezer-safe container. Freeze it for at least 6 hours or until it solidifies.
Step 4: Blend Again
After your mixture is frozen, break it into chunks and put them back into the blender. Blend until it’s creamy.
Step 5: Serve
Once you’ve reached the desired consistency, your homemade ice cream is ready to serve. You can enjoy it immediately or freeze it for later use.
See more: Are Blender Bottles Dishwasher Safe?
Tips and Tricks
While this is a basic recipe, don’t be afraid to let your imagination run wild and experiment with various flavor combinations. Add a generous handful of your favorite seasonal fruits, such as ripe strawberries or juicy peaches, to create a refreshing and fruity twist.
For chocolate lovers, sprinkle in a handful of decadent chocolate chips that will melt into creamy pockets of indulgence. To infuse your homemade ice cream with warm and comforting notes, consider adding a pinch of fragrant cinnamon or a hint of nutmeg, elevating the flavors to new heights.
Remember, the possibilities are truly endless when it comes to creating your own frozen masterpiece. So, unleash your inner chef, embark on a delightful journey of taste, and savor the sweet rewards of your labor.
FAQs
Creating your own ice cream is not only a rewarding culinary achievement, but it also kindles joy and creativity. As you blend, freeze, and re-blend ingredients, you’ll find yourself fully immersed in the process, tasting and adjusting flavors, and reaping the sweet rewards of your labor.
How can I make my ice cream creamier?
The creaminess of your ice cream primarily depends on the fat content. Using full-fat milk and heavy cream can result in a creamier and smoother texture. Moreover, blending the mixture a second time after it’s partially frozen can also enhance its creaminess. This process breaks up ice crystals that may have formed during the initial freezing and contributes to a smoother texture.
Can I use alternatives to sugar in this recipe?
Absolutely, you can swap out the sugar for a healthier alternative. Natural sweeteners like honey or maple syrup can work well. Just make sure to adjust the quantities as these sweeteners might be sweeter than regular sugar. Taste as you go to ensure you achieve the right level of sweetness.
Can I use this method to create dairy-free ice cream?
Yes, you certainly can. For a dairy-free version, substitute the milk and heavy cream with coconut milk or almond milk. Keep in mind that this might slightly alter the texture and flavor of your ice cream. However, it will still be delicious and a great option for those who are lactose intolerant or following a vegan diet.
How long can I store this homemade ice cream?
Homemade ice cream can be stored in the freezer for up to two weeks. Just ensure it is sealed properly in an airtight container to prevent ice crystals from forming on the surface. Also, if you are using fresh fruits or other perishable ingredients, it’s best to consume the ice cream within a week.
Why does my ice cream turn icy?
Ice crystals in your ice cream can result from several factors. The main reason could be the formation of large ice crystals during the freezing process. This can be mitigated by using full-fat ingredients and by blending the mixture a second time after it’s partially frozen, which helps break down larger ice crystals. Also, storing your ice cream properly in an airtight container can prevent moisture loss and limit ice crystal development.
Final Thought
In conclusion, making ice cream at home in a blender is a simple and rewarding process. It allows you to customize flavors to your liking and create healthier options compared to store-bought ones. The joy of creating your own dessert is also unmatched!
With this step-by-step guide, making ice cream at home is a breeze. From classic flavors like vanilla to more experimental ones, you have the freedom to create whatever you fancy. The whole process is also an excellent activity to do with kids. They will surely enjoy being involved in making their favorite treat!
Remember, the key to a rich and creamy ice cream lies in the ingredients and the blending-freezing-blending process. Use high-quality ingredients, and don’t skip the second blending. It makes a world of difference in achieving that creamy consistency we all love in a good ice cream.
Finally, store your homemade ice cream properly. This will help maintain its quality and extend its shelf life. Happy blending, and enjoy your homemade ice cream!
