- What Type of Coffee Beans Should I Use for Roasting at Home?
- Things to Prepare to Roast Coffee at Home
- How to Roast Coffee Beans (at Home)? – Some Easy Methods
- How Do You Know Your Coffee is Perfectly Roasted?
- Common Home Roasting Errors and Ways to Avoid Them
- How to Improve Your Home Roasting?
- The Process of Changing Coffee Beans When Roasting
- FAQs
- What’s the Best Way to Store Roasted Coffee Beans?
- How Long Will Roasted Coffee Beans Stay Fresh?
- What’s the Best Way to Brew Roasted Coffee Beans?
- Is It Better to Roast Coffee Beans Fast or Slow?
- How Long After Roasting Coffee Should You Drink Beans?
- Is It Cheaper to Roast Your Coffee?
- What Temperature is Best for Roasting Coffee?
- Does Roasting Coffee Longer Make It Stronger?
- Do You Wash Coffee Beans Before Roasting?
- Conclusion
How to Roast Coffee Beans?
Scents and memories are things that we can hardly forget, both of these things are linked together. I have a memory related to the aroma of roasted coffee, a memory that I am sure my family as well as myself will never forget. It’s the most ridiculous thing in life. One day, I roasted coffee at home. You know, roasted coffee’s smell is fragrant and brings a sense of relaxation.
Thus, I conveniently picked up the book on the table to read, forever immersed in the aroma of roasted coffee and the words of the book, I did not realize that the coffee was burned, and when I realized it, it was too late. would like. I messed up a lot of coffee, which I love so much. After that, every time I smelled the smell of roasted coffee, I remembered that memory.
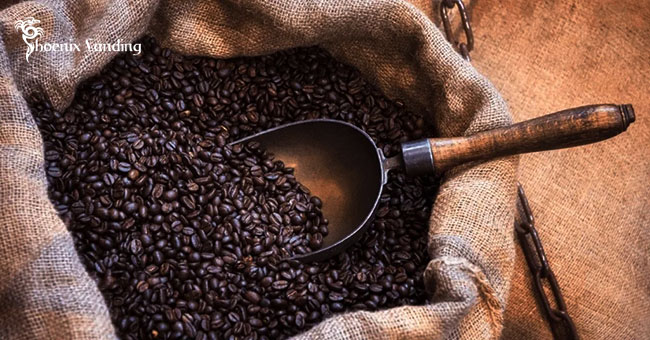
Now, back to the main topic. Coffee – that dark and magical elixir of life! Imagine the sensation of freshly-roasted beans releasing an awakening aroma as you carefully grind them for your delicious cup. Or take a sip of a perfectly roasted pour-over and savor those unmistakable flavor notes. With all its amazing benefits, it’s no wonder why coffee is one of the most popular drinks in the world. But how do you reach optimal flavor? Are you interested in learning how to roast coffee beans at home? If so, then this blog post is a must-read!
In this post, we’ll walk you through the entire process of roasting your coffee beans. We’ll discuss the coffee roasting processes of famous names, explain why temperature matters when roasting coffee beans, show you step-by-step instructions on roasting them yourself, and more. So if you’re ready for an insightful journey into the wonderful world of DIY roasting – let’s get started!
What Type of Coffee Beans Should I Use for Roasting at Home?
When roasting your coffee beans at home, the quality of the coffee bean you use is key. The best way to ensure a good roast is to start with high-quality green coffee beans. Choose specialty-grade Arabica beans ethically sourced from sustainable farms and ensure they are free from defects. Choose a single-origin coffee variety to ensure your beans are consistent in flavor and aroma.
When selecting which type of beans to use for roasting at home, consider the desired flavor profile that you want to achieve. Different types of beans will yield different flavor notes, so take the time to research what is available and what best suits your preferences. It is also helpful to read up on how different roasting methods will affect the flavor of the beans so you can adjust your technique accordingly.
When it comes to deciding on bean size, remember that larger beans tend to roast more evenly and consistently than smaller ones. Also, remember that lighter roasted coffees will have a brighter, more acidic flavor, and darker roasted coffees will be fuller-bodied and less acidic.
Finally, make sure to store your green coffee beans in an airtight container in a cool, dry place. This will help preserve their freshness and quality so you can get the most out of every cup!
Things to Prepare to Roast Coffee at Home
1. Coffee Beans: First and foremost, you’ll need to select good-quality coffee beans. It’s essential to choose the right type of beans as this will have an impact on the flavor of your roasted coffee.
2. A Roasting Machine: You’ll need a roasting machine to roast your coffee beans. There are many different types available, but air roasters are the most popular choice for home users since they offer more control over the process than automatic machines. (If you don’t have a roasting machine, you can use something else; see the sections below!)
3. A Heat Source: Most home roasting machines require some heat source to work correctly. Some machines use gas or electric stoves, while others may require a separate heating element such as a propane burner.
4. A Thermometer: Monitoring the temperature during roasting is important in order to achieve a consistent result. Having an accurate thermometer will help you stay on top of your roasting temperature throughout the process.
5. Smoke Suppression Setup: When roasting coffee, a lot of smoke can be produced. To keep the smoke from getting out of hand, it’s best to have some ventilation system in place and/or use a fan to disperse the smoke away from your cooking area.
6. Protective Gear: As with any cooking, it’s essential to wear protective gear when roasting coffee beans at home, such as oven mitts and safety glasses. This will help protect you from any potential burns or irritants that may be released during the roasting process.
7. Roasting Container: A dedicated container to hold your beans as they roast is essential to avoid cross-contamination and ensure uniform results. An airtight container with a lid will help keep your roasted beans fresh and ready for use.
8. Post-Roast Cooling Tray: After roasting your beans, it’s important to cool them down quickly before storing or grinding them. A cooling tray made of metal or ceramic can help speed up this process and also provide an even cooler temperature throughout your roasted beans.
9. Coffee Grinder: Once you’ve finished roasting your beans, you’ll need to grind them up to make your coffee. A hand-held burr grinder will give you the most consistent results and let you adjust the size of the grinds for whatever type of brew you’re making.
10. Coffee Brewing Equipment: Finally, you’ll need brewing equipment such as an espresso machine or pour-over brewer to make your coffee. Having this ready before starting your roasting process will make life much easier once the beans are done.
How to Roast Coffee Beans (at Home)? – Some Easy Methods
Now that you’ve chosen the perfect beans for your roasting adventure, it’s time to learn how to roast them! Several methods are available for home roasting, and each has its own set of pros and cons. Here are a few popular ones to consider:
Pan
Ingredients & Supplies:
- A heavy-bottomed pan (with a lid)
- Green coffee beans
- Cooling tray
- Metal spoon (or another stirring device)
- Thermometer (optional)
Step 1: Place the pan on medium-high to high heat. Heat the pan slowly and evenly before adding any ingredients. This ensures that all beans are exposed to an even temperature throughout roasting.
Step 2: Add your desired quantity of green coffee beans to the hot pan. The number of coffee beans used will depend on how much coffee you want to produce in one batch. Start with about 120 grams for a small batch; you can constantly adjust the quantity for future batches.
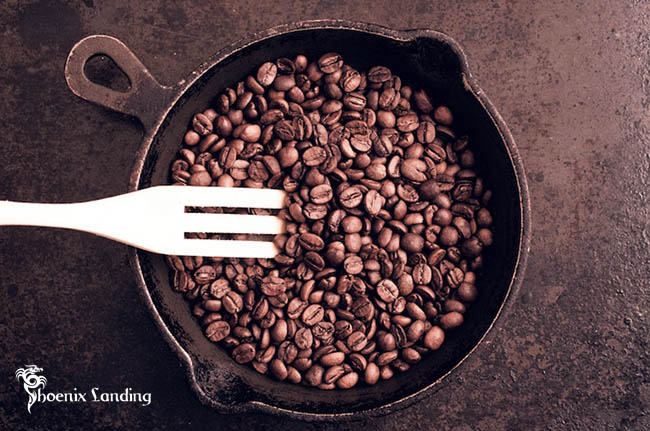
Step 3: Stir the beans constantly with a metal spoon or similar device to ensure even roasting. Continue stirring continuously until the beans develop a dark brown color and emit a distinctive aroma. Monitor the temperature of your pan with a thermometer, if desired. The ideal temperature range for coffee roasting is between 365-485 degrees Fahrenheit (185-250 degrees Celsius).
Step 4: Remove the pan from heat when the beans achieve your desired roast level, typically around 10 minutes after adding them to the hot pan. Pour the roasted beans onto a cooling tray to stop the cooking process and let them cool completely before storing or using them. Enjoy!
Oven
Once you have decided to roast coffee using an oven, the following steps will help ensure that your beans turn out delicious.
Ingredients & Supplies:
- Green (unroasted) coffee beans of your choice
- A shallow metal pan with sides at least 1 inch deep and a handle
- Use oven mitts/gloves to remove the hot pan from the oven
- An oven preheated to 400 degrees Fahrenheit
- A wooden spoon or another stirring utensil
- A colander or metal strainer for cooling the roasted beans quickly when finished
Steps:
1. Preheat your oven to 400°F (204°C). Make sure the oven rack is set in the center of the oven. Allow it to preheat for at least 10 minutes before beginning.
2. Place your metal pan on the center oven rack, and then pour enough green coffee beans into the pan so that they are no more than two inches deep. It’s essential to only roast a small amount of coffee at one time since all of them will roast at approximately the same rate.
3. Close the oven door and allow the beans to roast for 4-5 minutes. During this time, you’ll want to open up the oven occasionally and stir them with a wooden spoon or another stirring utensil so that they roast evenly.
4. After about 4-5 minutes, the beans will begin to swell and darken in color. This is when you’ll want to start stirring more frequently, about every 20-30 seconds or so.
5. Once the beans begin to emit a pleasant aroma and crackling sound and have reached your desired roast level, it’s time to remove them from the oven. Using an oven mitt or other glove, carefully remove the pan from the oven and pour the roasted beans into your colander or metal strainer for cooling.
6. Allow the beans to cool for at least 10 minutes before grinding and brewing them. Enjoy!
Popcorn Machine
While there are many ways to roast coffee, one of the simplest and most unique methods is to use a popcorn machine. With just a few simple ingredients, you can create your own freshly-roasted coffee beans right in the comfort of your own home. Here’s how:
Gather Your Ingredients:
- Green (unroasted) coffee beans (Note that one pound of green coffee beans will yield around 10 ounces of roasted beans)
- Vegetable oil or coconut oil for roasting
- An oven mitt (or thick cloth) to handle hot surfaces
Step 1: Prepare the Popcorn Machine. Take a few minutes to prepare the popcorn machine for roasting. Make sure that all loose pieces of popcorn or kernels are removed from the popping chamber, and thoroughly clean the machine’s interior and exterior surfaces with a damp cloth.
Step 2: Heat Up The Popcorn Maker. Next, plug in your popcorn maker and turn it on high heat for about five minutes. Preheat an oven-safe dish inside your kitchen oven at 150°C (300°F) during this time.
Step 3: Add The Coffee Beans And Oil To The Machine. When ready, carefully pour one tablespoon of oil into the hot popcorn maker before adding half a cup of green coffee beans. Close the lid of the popcorn machine and allow it to continue heating for about five to seven minutes or until you hear a popping noise, similar to popcorn popping in a hot air popper.
Step 4: Remove The Beans From The Machine. When done, carefully remove the dish with the roasted coffee beans from the oven and pour them onto a layer of paper towels to cool down. Once cooled, discard any leftover chaff (the papery skins that may have come off during roasting) before transferring your freshly-roasted beans into an airtight container for storage.
Coffee Machine
Gather your ingredients: To roast coffee using a coffee machine, you will need some green, unroasted coffee beans, as well as the equipment needed to use the machine. The essential item is the coffee roaster itself.
Step 1. Prepare the machine: Before you can begin roasting your beans, you will need to prepare the coffee roaster. Begin by turning on the power switch and setting the temperature accordingly. If possible, set it so that the bean temperature is around 450°F (232°C).
Step 2. Add your beans: Once the machine has heated up properly, add your green coffee beans into its hopper and turn on the motor switch to start rotating them in an even pattern. This will help ensure an even roast.
Step 3. Monitor the process: As the beans rotate, you should keep an eye on them to ensure they don’t burn. Listen for a cracking sound indicating when the coffee has reached its desired toastiness.
Step 4. Stop roasting: Once you have achieved your desired level of roasting, turn off the power switch and stop rotating the beans. Allow them to cool down before transferring them into an airtight container for storage or immediate use.
Step 5. Enjoy your roasted coffee: Now it is time to enjoy your freshly roasted coffee! The flavor and aroma of freshly roasted beans are incomparable and will be sure to satisfy all coffee lovers. Enjoy!
Step 6. Clean up: Finally, clean your roaster thoroughly after each use. This will help ensure that the machine runs efficiently and lasts longer. Pay special attention to any buildup of coffee oils or residue left behind in the hopper or other parts of the machine. Regularly replacing filters will also help keep your coffee tasting fresh.
Here are the ways to roast coffee at home. Roasting coffee can be a fun activity, and the result is always worth it! Remember to use caution when roasting coffee beans and practice proper safety measures. With these tips, you’ll soon be a master of home coffee roasting in no time!
How Do You Know Your Coffee is Perfectly Roasted?
One of the biggest factors in determining whether your coffee is perfectly roasted is its appearance and smell. Lightly roasted beans should have a light, golden brown color with no visible oil on the surface. When you grind them, they should smell nutty and sweet. Darker roasts will be darker in color and have an oily sheen on their surfaces. The aroma will be more intense and smoky when you grind them up.
The taste of the brewed coffee can also tell you if it’s been properly roasted. If it tastes too sour, it has likely been over-roasted or cooked too quickly during the roasting process, resulting in a burned flavor. On the other hand, if it tastes too weak or watery, then it has either been under-roasted or roasted too slowly.
The last way to know if your coffee is perfectly roasted is to pay attention to the body of the brewed coffee. Ideally, you want a full-bodied cup with no acidic aftertaste. When in doubt, let a professional barista or quality assurance specialist at your local cafe evaluate your coffee’s quality.
They will be able to tell you whether it’s flavorful enough and can recommend adjustments if needed. With their help, you will be sure that your next batch of freshly roasted beans is up to par! And remember, we can’t roast perfectly the first few times. Be patient, learn through each roast, and you will find your own recipe over time. Wish you early success!
Common Home Roasting Errors and Ways to Avoid Them
Home roasting is no easy feat and can be intimidating for amateur enthusiasts. If you aren’t careful, it is easy to end up with a batch of over or under-roasted beans that will ruin an entire pot of coffee. To get the most out of your home roasting experience, here are some common mistakes to avoid:
1. Not Monitoring: When roasting at home, it is essential to closely monitor the process, as beans can burn quickly in a few seconds if not watched carefully. Make sure to keep an eye on your roast, and remember that stirring and shaking the beans during roasting will help prevent them from burning.
2. Roasting Too Quickly: Roasting too quickly or over-roasting the beans can result in a burnt taste, so be careful when adjusting temperatures or time limits while roasting. Taking notes even before you start each batch of roasts can help you accurately repeat the same level of roast in future batches.
3. Roasting at Too High Temperatures: Be aware that high-temperature settings may cause the beans to burn quickly, resulting in a bitter cup of coffee. It is best to use lower temperatures and longer roasting times to achieve the desired flavor profile.
4. Not Storing Properly: After completing your roast, it is important to cool down the beans before transferring them into an airtight container for storage or immediate use. Storing roasted coffee in an open container can result in flavor loss and staleness over time due to oxidation from exposure to air. Be sure to keep your roasted coffee stored tightly sealed to preserve its freshness and extended shelf life!
By avoiding these common home-roasting errors, you will surely have perfectly roasted coffee beans that will make for a delicious cup of coffee! Have fun experimenting with different roast levels and flavors until you find the best one. Good luck!
How to Improve Your Home Roasting?
Home roasting is a great way to make your own coffee beans at home. It can be an enjoyable and rewarding experience but it requires practice and patience to perfect the process. Here are some tips on how to improve your home roasting:
1. Use fresh green beans – The more quality ingredients you use in home roasting, the better the final product will be. Buy high-quality green coffee beans that have been recently roasted and check to ensure they are not stale or moldy before beginning.
2. Start with a light roast – As you gain more experience in home roasting, you’ll likely find that light roasts bring out the best flavors from each bean variety—so always start with lighter roasts until you get a better understanding of the process.
3. Roast in small batches – Home roasting often requires trial and error as you learn to perfect the process, so it’s best to start with smaller batches that can be easily adjusted or discarded if something goes wrong. Additionally, roasting smaller batches allows for less waste in case there are any errors during the roast.
4. Monitor temperature closely – Temperature control is key when home roasting. Too high a temperature will lead to an overly charred roast; too low a temperature and your beans won’t caramelize properly and will lack flavor complexity. It is important to keep track of changes in temperature throughout the roast, which can be done using a thermometer.
5. Take detailed notes – Keeping a record of roast temperatures and times, as well as the type of bean used, will help you learn what works best with each variety of coffee. Making detailed notes can also help you replicate successful roasts when needed.
With practice and patience, home roasting can be an enjoyable experience that results in a great-tasting coffee. These tips should help you improve your home-roasted beans and make the most out of every batch!
The Process of Changing Coffee Beans When Roasting
Coffee beans undergo several changes in color and scent when roasting. The shade of the bean can go from a light tan to a deep chocolate brown, depending on the desired flavor profile. As the roasting process progresses, the coffee’s aroma will become more intense and its flavor will deepen.
During this process, heat causes chemical reactions, breaking down the coffee bean’s proteins. This reaction produces sugars that caramelize and give rise to warm flavors such as nutty, caramelly notes or even cocoa-like tones. The oils found in some coffee beans may also be released during the roast, contributing to further complexity in flavor profiles.
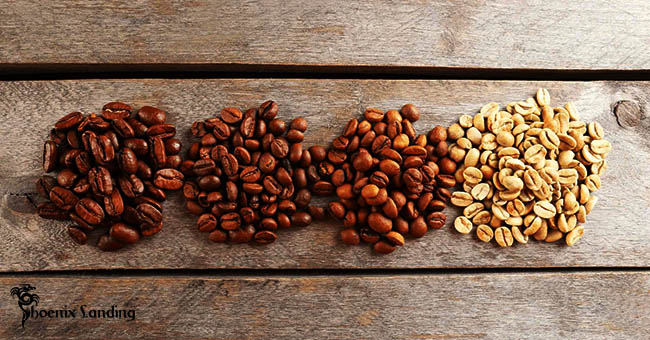
Once roasted, these changes can be evaluated through a process known as “cupping.” Cupping involves smelling and tasting the coffee to analyze its characteristics. Through cupping, experienced roasters can determine if a bean has been correctly roasted and judge whether it is ready for grinding or further roasting.
The roaster carefully monitors the roast time of each batch to ensure that all beans are exposed to an even amount of heat. This helps create consistency between batches while maintaining the desired flavor profile of the particular bean. Roasting times may vary depending on the type of bean and desired flavor but typically fall between 8-15 minutes.
After roasting, the beans are cooled down quickly and then allowed to rest before packaging or grinding. This allows the flavor to develop, further giving the coffee its unmistakable taste.
By understanding and controlling the roast process, experienced roasters can create fine blends of coffee with unique taste profiles that will please any coffee lover. Whether it’s a light and fruity blend or something bolder and earthier, there’s sure to be something for everyone. So why not try your hand at making some home-brewed coffee today? You might surprise yourself!
FAQs
What’s the Best Way to Store Roasted Coffee Beans?
The best way to store roasted coffee beans is in an airtight container. This prevents the beans from losing their flavor and aroma over time. It also helps to keep out moisture, light, and oxygen, which can cause the beans to go stale faster. Avoid storing them in direct sunlight or areas with high humidity levels, as this can also lead to staleness.
Additionally, it’s important to store coffee beans away from other strong-smelling foods so they don’t pick up unwanted flavors. Lastly, make sure you buy a quality container that will provide a good seal when closed, so no air escapes. This will help ensure your coffee remains fresh for optimal drinking pleasure!
How Long Will Roasted Coffee Beans Stay Fresh?
The shelf life of roasted coffee beans depends on how they are stored. If you store them in an airtight container, away from light and moisture, your beans can stay fresh for up to two weeks. After that, their flavor will start to degrade. If you want to keep your beans fresher longer, try storing them in the freezer. This will help preserve their flavor for up to three months or more! Make sure you seal the container tightly so there is no moisture loss due to condensation when taking them out of the freezer.
What’s the Best Way to Brew Roasted Coffee Beans?
The best way to brew roasted coffee beans is by using a French press. This brewing method allows you to bring out your freshly roasted coffee’s full flavor and aroma. First, preheat your French press with hot water, then add coarsely ground coffee (about two tablespoons per cup). Pour boiling water over the grounds, making sure they are all saturated. Allow the mixture to steep for 3-4 minutes before pressing down on the plunger. Finally, pour the brewed coffee into cups or mugs and enjoy!
You can also use an electric drip brewer or even a single-serve machine if you need access to a French press. Just make sure to use freshly roasted beans for maximum flavor and aroma. For the best results, grind your beans just before use. This will ensure that you get the most out of your coffee!
Is It Better to Roast Coffee Beans Fast or Slow?
The answer to this question could be clearer. Generally, when roasting coffee beans fast, you will get a more intense flavor profile and higher caffeine content than when roasting slowly. However, the taste can sometimes be compromised due to the scorching or burning of the beans if they are not monitored closely during the process.
Slow roasting may take longer, but it can often result in a cleaner cup with a more balanced flavor profile that still boasts some of the characteristic notes associated with each bean variety. Ultimately, it all depends on what type of flavor you aim for and how much time you have available to roast your beans. Experimenting with both methods is the best way to find the roast that works best for you.
How Long After Roasting Coffee Should You Drink Beans?
It is recommended to wait for one to two days after roasting before drinking the coffee beans. This allows the flavor and aroma of the beans to mature and develop, giving you a better-tasting cup of coffee. Roasted beans can be stored for up to two weeks in an airtight container at room temperature, but it is best to use them as soon as possible for optimal freshness. If you intend to store the beans for longer periods, store them in an airtight container in your refrigerator or freezer instead. Enjoying freshly roasted coffee can make all the difference in taste and quality!
Is It Cheaper to Roast Your Coffee?
When roasting your coffee, the cost is much lower than buying pre-roasted beans. With a few essential tools and everyday household items, you can roast your coffee for just a fraction of the cost of store-bought beans. The savings will still be significant even if you buy unroasted green beans, typically cheaper than roasted ones.
Roasting your coffee also allows you to customize the taste and strength of your brew to get precisely what you want from each cup. In addition, roasting at home is an environmentally friendly way to consume coffee – no waste or single-use packaging is involved.
What Temperature is Best for Roasting Coffee?
The ideal temperature for roasting coffee is between 375 and 425 degrees Fahrenheit. Any higher than this, you risk over-roasting the beans, leading to a burnt flavor in your cup; any lower, you might need to extract more of the desirable flavors from the beans. Experiment with different temperatures to find what works best for your specific roast.
Remember that different beans will require slightly different temperatures, so adjusting accordingly is essential. Additionally, as you get more experienced with roasting coffee, you can experiment by varying the temperature throughout the roasting process. This can allow you to bring out even more flavor profiles of your coffee!
Does Roasting Coffee Longer Make It Stronger?
The answer to this question is both yes and no. Roasting coffee for a more extended period will result in a darker and more intense flavor, which some people consider to be stronger. However, it’s important to note that roasting coffee beans for too long can also lead to an overly bitter taste, which could be considered too strong by many. Additionally, roasting the beans for an extended amount of time may cause them to burn and become overly roasted, resulting in an unpleasant burnt-tasting cup of coffee.
The right balance between lightness and darkness depends on personal preference and the type of beans used. Generally speaking, if you want a bolder-tasting cup of coffee, then try roasting your beans for a more extended period. On the other hand, if you’re looking for a lighter-bodied cup, try roasting them for a shorter time. Ultimately, it’s essential to experiment and find the right balance between lightness and darkness that works best for you.
Do You Wash Coffee Beans Before Roasting?
No, you don’t need to wash coffee beans before roasting. Washing the beans may remove some of their natural oils and cause them to roast unevenly. It is better to leave the beans in their natural state while ensuring they have been properly stored and protected from environmental contaminants that could affect flavor or quality.
Roasting is a process where heat is applied to drive off moisture and develop flavor characteristics sought after by baristas worldwide. The longer the beans are exposed to heat, the darker they will become, resulting in variations of light, medium, and dark roasted coffees. When heated correctly, washing your coffee before roasting is unnecessary as long as it does not appear dirty or have an unpleasant odor.
Conclusion
You have come to the conclusion of our “How to Roast Coffee Beans” article. In this article, we have introduced you to 4 ways to roast coffee at home and learn about the coffee roasting process to get a perfect roast.
The goal of roasting coffee beans is to bring out the flavor and texture that make each variety unique. You can learn how to roast your coffee beans at home with some practice and experimentation. Roasting your coffee beans allows you to control every aspect of the process from start to finish, giving you access to perfectly roasted beans whenever you need them.

Not only is this a fun activity in itself, but it also helps create a cup of delicious specially-crafted coffee that will satisfy you every time. So go ahead and give it a shot! You may be pleasantly surprised by what you can achieve.
We hope this article will be useful to you, if you have any questions or find any mistakes, don’t hesitate to comment below, it will help us a lot. Thanks for reading my writing. Visit Phoenix Landing Bar to read many good and valuable articles.
