“How to Change Beer Lines in Kegerator” is an essential skill for anyone looking to maintain the freshness and flavor of their draft beer. It’s a process that may seem daunting at first, but with the right knowledge and tools, it becomes a straightforward task.
Kegerators, like any beverage dispensing system, require regular maintenance to ensure optimal performance. Over time, beer lines can accumulate deposits that affect the taste of the beer and, in some cases, may even lead to health issues.
This guide aims to provide step-by-step instructions to help you confidently change the beer lines in your kegerator.
Whether you’re a bar owner committed to delivering the best possible experience to your customers or a homebrew enthusiast keen to enjoy your beer at its best, understanding this procedure can make a significant difference. Let’s dive into the process.
How to Change Beer Lines in Kegerator
Before we start, gather the necessary tools and materials. You will need a beer line cleaning kit, a new beer line, a wrench, and a pair of pliers. Note that the exact tools may vary depending on your kegerator model. Always refer to your kegerator’s user manual for specific instructions.
First, you’ll need to shut off the CO2 supply to your kegerator. This can usually be done by turning the regulator to the closed position. It is crucial to prevent any accidental release of pressurized CO2 during the process.
Next, remove the keg coupler by loosening it with the wrench. Keep a bucket nearby as beer may spill out when you disconnect the lines. After that, detach the beer line from the keg coupler. You may need to use pliers for this step.
Once you’ve detached the old beer line, attach the new one to the keg coupler. Use pliers to secure the connection. Ensure the new line is connected firmly to prevent leaks.
Finally, connect the other end of the new beer line to the tap. Reattach the keg coupler to the keg and open the CO2 supply. Run a small amount of beer through the lines to check for any leaks.
Understanding about Beer Line Maintenance
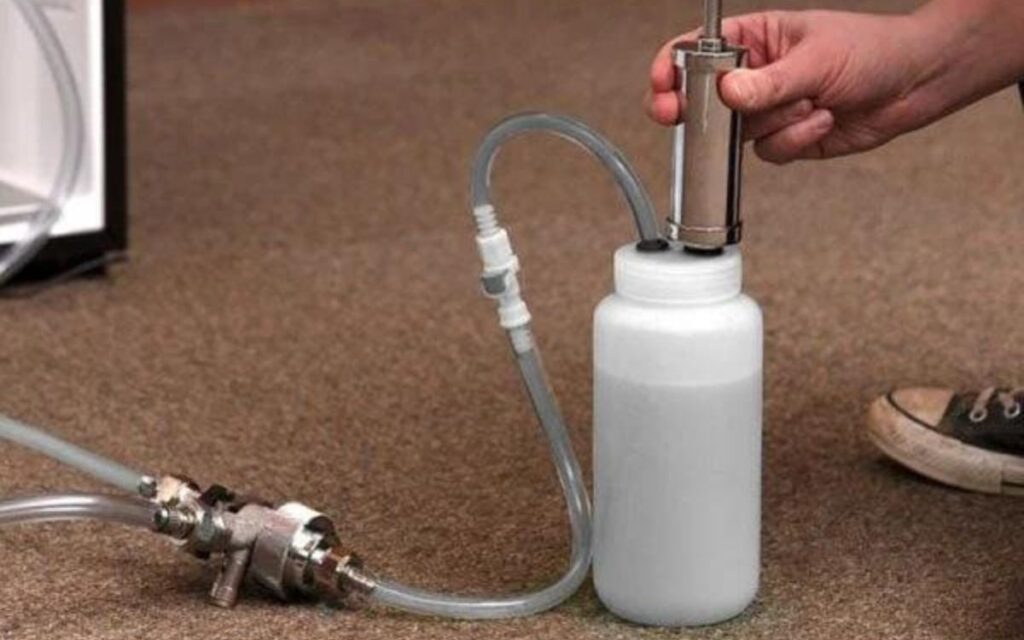
It is important to remember that changing the beer lines should not be the only part of maintaining your kegerator. Regular cleaning and sanitizing of the beer lines are also essential for serving tasty, fresh beer every time.
Typically, a line cleaner solution is used in combination with hot water and CO2 pressure to clean the inside of the beer lines. This process should be repeated every two months or so to keep the lines in good condition.
Hopefully this guide has given you the information and confidence needed to attend to your beer line maintenance. Remember, taking care of your kegerator is key for delivering consistently delicious draft beer!
By following these steps, you can make sure that the beer lines don’t affect the quality, taste, and freshness of your beer. And if you ever have any questions or difficulties with the process, don’t hesitate to reach out for professional help from your kegerator manufacturer or distributor. After all, it’s better to be safe than sorry!
FAQs about Changing Beer Lines in Kegerator
When dealing with kegerators and beer line maintenance, many questions might arise. We’ve compiled a few common queries and their answers to offer additional insight into this essential task.
Q: How often should I change the beer lines in my kegerator?
A: The frequency of changing beer lines depends on usage and the type of beer you’re dispensing. As a general rule, beer lines should be replaced every year or two, but the lines should be cleaned every two weeks to a month.
For commercial establishments that serve a high volume of beer, the lines might need to be replaced more often. Regular maintenance is important as it prevents the build-up of yeast, sediments, and bacteria, which could alter the taste of the beer and potentially compromise the health of drinkers.
Q: Can I clean my beer lines instead of replacing them?
A: Yes, regular cleaning of beer lines is a key part of kegerator maintenance. However, over time, even well-cleaned lines can begin to degrade, affecting the flavor of the beer. While cleaning can remove surface deposits, it may not address microscopic scratches inside the line where bacteria can hide.
Corrosion or damage are also indicators that it’s time for a replacement. Therefore, while regular cleaning is essential, it does not entirely eliminate the need for occasional line replacement.
Q: What type of beer line should I use for my kegerator?
A: The type of beer line you should use depends on your specific kegerator system and the distance from the keg to the tap. Most home kegerators use a standard 5/16″ inner diameter line for the air line and a 3/16″ line for the beer line. However, if the length from your keg to the tap is more than 5 feet, you may need a larger diameter line to prevent foaming.
Always check the specifications of your kegerator before purchasing new lines to ensure they’re compatible. In general, it’s recommended to use lines made from food-grade vinyl or stainless steel, as they’re easy to clean and don’t impart any flavors to the beer.
Final Thought
Maintaining your kegerator and ensuring the quality of your beer doesn’t have to be a daunting task. As discussed, regular maintenance, cleaning, and periodic replacement of beer lines can significantly improve your beer tasting experience. A well-maintained kegerator not only offers a fresh, clean taste but also ensures the longevity of your equipment.
Remember, each kegerator is unique, and the type of beer line used can vary. Hence, understanding your system’s requirements is crucial. Consult your kegerator’s manual or contact the manufacturer if you’re unsure.
In conclusion, taking care of your kegerator and changing the beer lines when necessary is a worthwhile investment of time and effort. Only by doing so, you can enjoy consistently delicious beer from your kegerator.
