“How to Use a Kegerator” is a topic that has piqued the interest of many beer enthusiasts and home brewers. A kegerator, a hybrid of a keg and refrigerator, is a refrigerator-like device that dispenses kegged beer.
Understanding the intricacies of using a kegerator can transform your home or office into a local favorite for beer lovers. Not only does it ensure freshly tapped beer, but the kegerator also maintains your beer in the perfect environment to retain its crisp, refreshing taste.
The following sections will delve deeper into the operational aspects of a kegerator. We’ll discuss everything from the basic setup to the meticulous maintenance required for optimal performance.
Whether you’re a novice entertaining the idea of buying your first kegerator or a seasoned user looking to hone your skills, this guide is designed for you. So, let’s embark on this journey to make the most of your kegerating experience.
How to Use a Kegerator
To begin with, using a kegerator involves a few fundamental steps. First, it’s essential to correctly install the CO2 cylinder and ensure the kegerator is at the right temperature. Then, you must carefully connect your keg to the kegerator.
Finally, you can begin dispensing beer, carefully managing the CO2 pressure to maintain the perfect pour. Let’s break down each of these steps in detail.
Setting up Your Kegerator
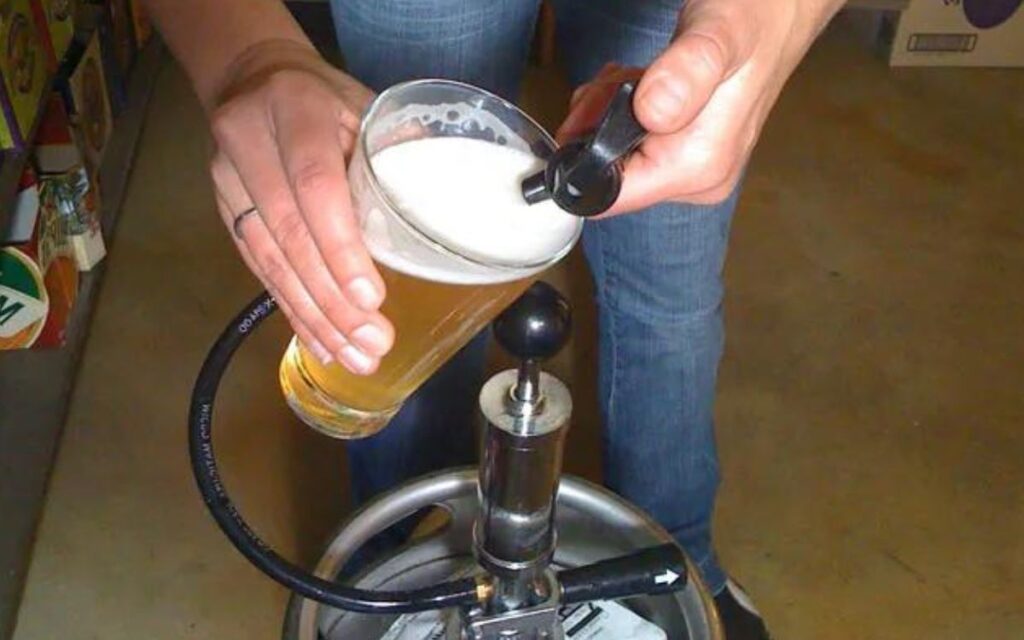
Initial setup of a kegerator is a straightforward process. Start by properly placing the CO2 cylinder inside the kegerator, making sure it is firmly secured. Connect the gas line from the CO2 regulator to the keg coupler, and attach the beer line from the keg coupler to the beer faucet.
Installing the Keg
Installing the keg is the next step. Begin by cleaning and sanitizing the keg, coupler, and lines. Once done, you can connect the coupler to the keg. Make sure the coupler handle is in the upright position before attaching it. Rotate the coupler clockwise until it is securely fastened.
Setting the Pressure
Once the keg is installed, you need to set the correct pressure on the CO2 regulator. The typical setting for most beers is between 10 to 12 PSI, but this may vary depending on the type of beer and altitude. Always remember, adjusting the pressure should be done gradually to prevent any damage to the regulator.
Maintaining Your Kegerator
Maintenance is crucial for the longevity and optimal performance of your kegerator. Regular cleaning of the lines, faucet, and keg coupler is recommended to maintain the taste of your beer. Most manufacturers suggest a thorough cleaning every two weeks or every time you switch kegs.
By following these steps, you can ensure a smooth and successful kegerating experience. Enjoy your freshly tapped, cold, and crisp beer!
Tips on Storing and Serving Beer from Your Kegerator
Storing and serving beer from your kegerator needs careful attention to temperature, pressure and cleanliness to maintain optimal taste and freshness. Let’s take a look at some tips to help you get the best from your kegerator.
Firstly, temperature is crucial. Different types of beers have different ideal serving temperatures. Lagers typically taste best around 38-40°F, while ales are better slightly warmer, typically around 44-52°F. It’s important to use a temperature controller to ensure your kegerator is set to the appropriate temperature for your beer.
The second point to consider is pressure regulation. Your beer’s carbonation level is directly dependent on the pressure settings of your CO2 regulator. Incorrect pressure can lead to over-carbonation causing foamy beer or under-carbonation resulting in flat beer. It’s best to start with a recommended PSI for your beer and adjust as necessary.
Thirdly, ensure cleanliness of the beer lines. Over time, yeast and bacteria can build up in your beer lines, affecting the taste of your beer. Regular cleaning is crucial. Some beer enthusiasts recommend cleaning after every keg, while others suggest every two weeks.
Lastly, when serving beer, it’s best to use clean, cold glasses. This not only provides a refreshing drink but also helps maintain the beer’s head (foam), enhancing the overall drinking experience.
FAQs about Using a Kegerator
Using a kegerator might seem complex initially, but with time and practice, it becomes second nature. Here are some common questions and their answers to enhance your understand and ease your kegerating experience.
Q: Why is my beer foamy?
A: Foamy beer can be a result of several factors. Primarily, it could be due to incorrect temperature or pressure settings. If your kegerator is too warm or the CO2 pressure is too high, your beer may become over-carbonated and result in excessive foam.
Make sure to set your kegerator at the recommended temperature for the specific beer type, usually between 38-52°F. Similarly, adjust the CO2 pressure gradually, typically within the range of 10 to 12 PSI.
Another potential cause could be unclean beer lines. Yeast and bacteria buildup in your beer lines can affect the beer’s taste and texture, leading to foamy beer. Regular cleaning of the beer lines, ideally after every keg change or every two weeks, can help maintain the beer’s optimal consistency.
Q: How often should I clean my kegerator?
A: Regular maintenance is crucial for optimal performance of your kegerator. Most manufacturers suggest cleaning your kegerator every two weeks or whenever you switch kegs, whichever comes first.
Ensure to clean all components: the lines, faucet, and keg coupler. Over time, yeast and bacteria can build up in these areas, affecting the taste of your beer. Regular cleaning prevents this buildup and helps maintain the freshness and crisp taste of your beer.
Q: How do I adjust the temperature on my kegerator?
A: Adjusting the temperature of your kegerator is usually a simple process that involves turning a dial or setting a digital temperature control, depending on your kegerator model.
Different types of beers require different serving temperatures. For instance, lagers typically taste best around 38-40°F, while ales are better slightly warmer, usually around 44-52°F.
Make sure to adjust your kegerator’s temperature based on the specific beer type you are serving to ensure optimal taste. Always remember to wait for your kegerator to reach the desired temperature before tapping a new keg.
Final Thought
Using a kegerator may appear daunting at first, but with the above tips and tricks, you’ll soon become a pro at maintaining and operating it. Understanding the importance of temperature, pressure, and cleanliness is key to getting the most out of your kegerator.
Having a kegerator at home, you can enjoy a variety of beers at their ideal serving temperatures. No more settling for lukewarm or overly chilled beer. This is one of the many advantages of having a kegerator.
In conclusion, a kegerator is more than just a cool gadget, it’s an investment in an enhanced beer-drinking experience. Armed with this guide on how to use a kegerator, you’re all set to enjoy crisp, fresh, and perfectly chilled beer right at home.
aCheers to that! And remember, the secret to a great beer is not just in the brew, but in the serving and that’s where your kegerator comes in.
